
Handheld label makers are surprisingly useful when it comes to beating clutter and keeping a home organized. A label may seem like a small detail, but it works as a simple reminder of where something belongs. Nobody has to open three containers or guess which drawer holds the batteries.
I’ve found that labels clear up quite a bit of confusion, especially in a busy household where several people use the same spaces. They make it easier to put things away correctly and, perhaps just as importantly, find them again later.
There is also a visual benefit. Matching labels can make an ordinary pantry, closet, or storage shelf look cleaner and more thoughtfully arranged without requiring expensive containers or a complete organizational makeover.
Can a Handheld Label Maker Help Organize a Home?
A handheld label maker gives household items a clear place to belong. Use it to mark pantry containers, closet bins, paperwork, drawers, baskets, shelves, and garage storage. Short, readable labels make it easier for everyone to find items and return them to the right place.
Key Takeaways
- Use labels to give everyday items a clear and consistent home.
- Label shelves, drawers, baskets, and containers—not just storage boxes.
- Keep label names short, readable, and easy for everyone to understand.
- Choose a portable label maker that is comfortable to use throughout the house.
- Replace labels when the contents or purpose of a storage area changes.
Where Label Makers Shine at Home
A handheld label maker is not limited to office files or school supplies. Because it is portable, I can carry it from room to room and create labels while I’m organizing. That is much easier than trying to remember everything and printing labels later.
Where a Label Maker Can Make the Biggest Difference
Start with one cluttered area and build your system gradually.
Kitchen
Label spices, pantry jars, snack baskets, leftovers, shelves, and baking supplies.
Closets
Identify seasonal clothing, linens, shoes, accessories, and storage bins.
Home Office
Organize bills, receipts, warranties, manuals, cables, and document boxes.
Garage
Mark tools, hardware drawers, holiday decorations, repair supplies, and storage boxes.
Kitchen and Pantry
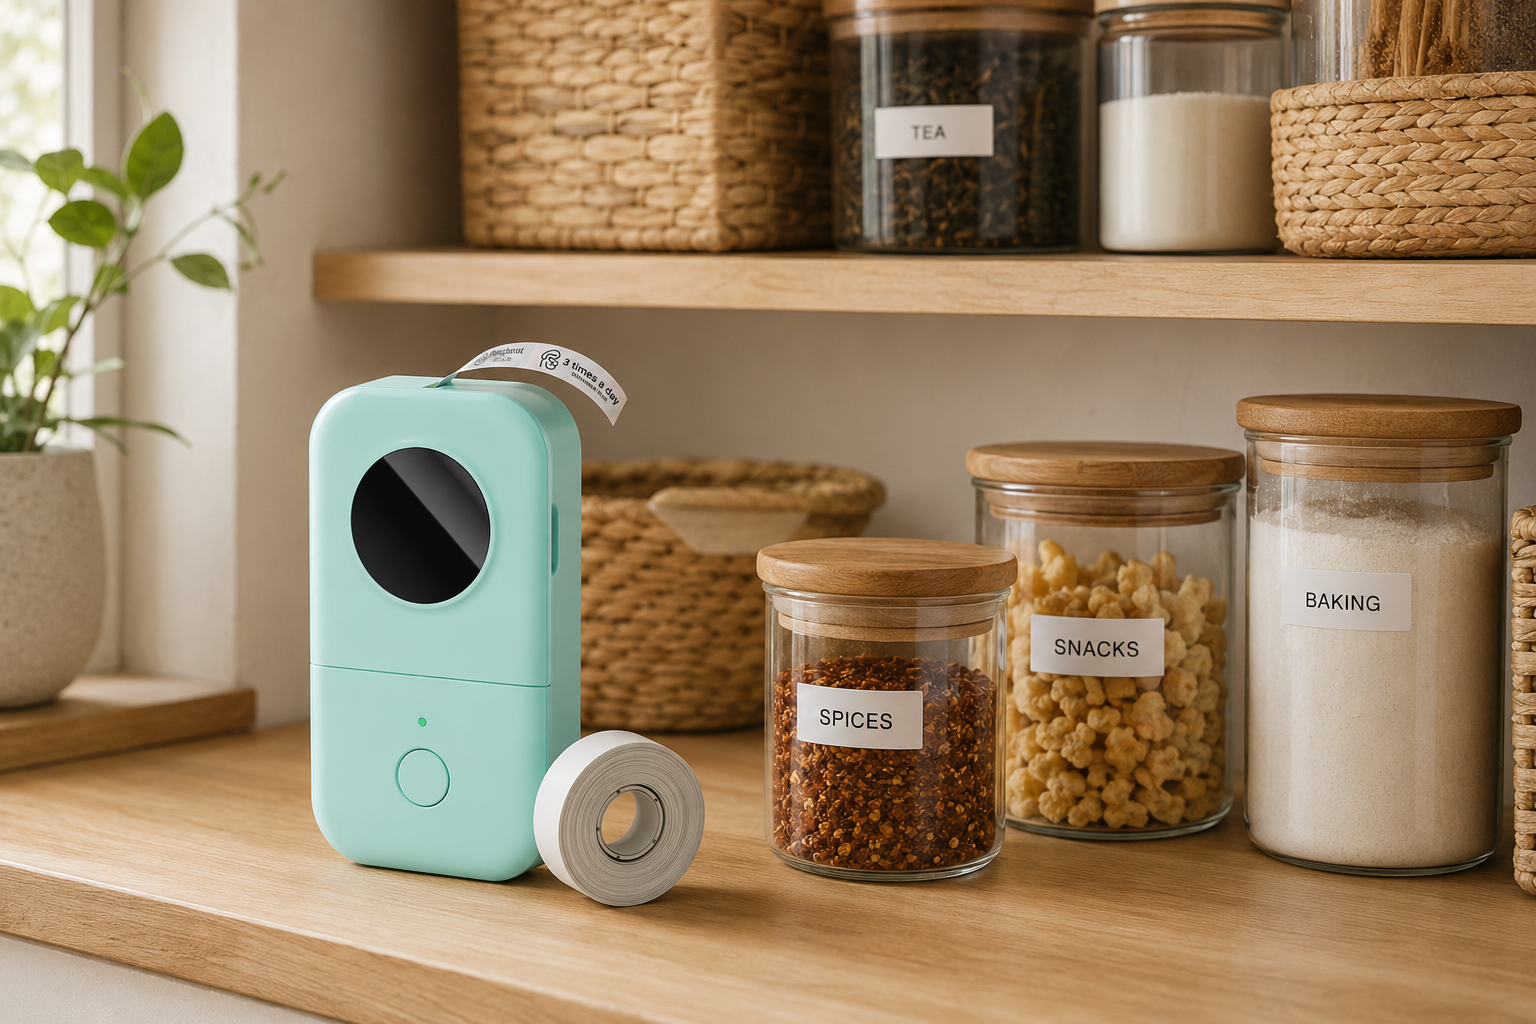
The kitchen is one of the best places to begin. Spices, pantry jars, snack baskets, baking supplies, and food-storage containers are all easier to manage when they are clearly marked.
Labels are especially helpful when several containers look alike. Flour, powdered sugar, and baking mixes, for example, can be surprisingly difficult to identify at a glance.
You can also label shelves inside cabinets or the pantry. Simple descriptions such as “Breakfast,” “Snacks,” “Baking,” and “Canned Goods” help everyone understand where items should be returned. The labels do not need to be elaborate. In fact, simple usually works better.
For leftovers, removable labels can help identify what is in a container and when it was prepared. Just make sure the label material is appropriate for the container and how it will be stored.
Closets and Clothing Storage
Closets can become confusing because they often hold everyday clothing, seasonal items, shoes, linens, and accessories in the same space.
Labels on drawers, shelves, and storage bins make it easier to separate scarves, hats, gloves, belts, shoes, and out-of-season clothing. They are particularly useful on containers that are stacked or placed on high shelves.
Seasonal labels such as “Winter Accessories,” “Summer Clothing,” or “Guest Bedding” provide enough information without becoming overly specific. If a storage system is too complicated, I think it becomes harder to maintain.
Home Office and Paperwork
Paper clutter has a habit of building up quietly. Bills, receipts, warranties, instruction manuals, and important records can quickly become one large pile if they do not have assigned places.
Labels give each type of paperwork a clear destination. File folders, document boxes, and desk drawers can be marked with straightforward categories such as:
- Bills to Pay
- Receipts
- Tax Records
- Warranties
- Manuals
- Documents to File
A label maker is also useful for charger pouches, power cords, memory cards, and cable-storage bins. When several black cables look almost identical, a small label can save an unreasonable amount of frustration.
Garage and Storage Rooms
Garages, basements, and storage rooms usually contain things that are not used every day. That makes labels even more valuable.
Toolboxes, hardware drawers, holiday decorations, camping gear, automotive supplies, and household repair items can all be identified without opening every container. Labeling the outside of a box saves time, while labeling the shelf beneath it helps ensure the box returns to the same location.
Broad labels often work best here. “Christmas Lights” is more helpful than “Holiday,” and “Painting Supplies” is clearer than “Projects.” A label should tell you enough to find what you need without turning into a complete inventory list.
What to Look for in a Handheld Label Maker
The best label maker for home organization is not necessarily the model with the longest feature list. It is the one you will actually use.
I prefer a model that is compact, easy to carry, and quick to operate. If creating one label requires several complicated steps, the machine will probably end up forgotten in a drawer.
Consider the following features before choosing one:
- A simple setup and printing process
- Clear, readable print quality
- Support for different tape widths and styles
- Replacement tape that is easy to find
- Rechargeable or replaceable-battery operation
- An app connection if you prefer designing labels on your phone
- Label materials suitable for the surfaces you plan to organize
Bluetooth models can be convenient because they allow you to choose fonts, symbols, borders, and layouts from a phone. The compact Phomemo D30 is one example worth comparing if you expect to create labels in several rooms.
Some people will prefer a traditional label maker with a built-in keyboard, though. It can be faster for basic labels and does not require opening an app. Neither approach is automatically better; it depends on how much customization you want.
App-Based or Built-In Keyboard?
| Feature | App-Based Model | Built-In Keyboard |
|---|---|---|
| Best for | Custom designs and label styles | Fast, straightforward labels |
| Setup | Usually requires a phone and app | Can normally be used immediately |
| Design choices | More fonts, borders, icons, and layouts | Fewer choices but less complexity |
| Portability | Often compact and lightweight | May be slightly larger because of the keyboard |
| Good choice when | You enjoy customizing your organization system | You value speed and simplicity |
My Tips for Effective Labeling
Keep Names Short and Consistent
A label should be understood at a glance. Use “Batteries” instead of “Various Household Batteries and Accessories.”
Consistency matters too. If one container says “Cleaning Supplies,” avoid labeling a similar container “Cleaning Stuff.” Using the same naming style makes the entire system easier to follow.
Make Every Label Easy to Read
Choose a font and label size that can be read from a comfortable distance. Tiny decorative lettering may look attractive up close, but it is not especially useful on a high pantry shelf or garage bin.
Good contrast matters as well. Dark lettering on a light background is often easier to read than a complicated combination of patterns and colors.
Place Labels Where People Naturally Look
Put labels on the front of bins, baskets, drawers, and containers whenever possible. A label on top may disappear once containers are stacked.
For shelves, position the label along the front edge. Before attaching it, wipe away dust, grease, or moisture so the adhesive has a clean surface.
Update the System When Things Change
Organization is not permanent. A basket that holds gloves during winter may be used for something entirely different in summer.
Remove or replace outdated labels as soon as a storage area changes. An incorrect label can cause more confusion than having no label at all.
Use Color Without Making It Complicated
Different colors can help separate categories. You might use one color for food, another for cleaning supplies, and a third for children’s items.
Still, I would not create an elaborate color code that everyone has to memorize. Color should support the words on the label, not replace them.
Why Labels Help Organization Last
Trying to remember where every household item belongs can feel surprisingly overwhelming. Even a well-organized room can drift back into clutter when its storage system is not obvious.
Visible labels remove that guesswork. Everyone can see where the spatula, craft supplies, spare chargers, or battery box belongs without asking for help. Items become easier to grab, use, and return.
That is what makes labeling effective. It does not depend on one person constantly reminding everyone else what to do. The storage system explains itself.
Quick Label Maker Tips
- Label shelves, drawers, baskets, and dividers as well as containers.
- Keep an extra roll of your most-used label tape available.
- Label new storage containers as soon as you begin using them.
- Clean and dry each surface before applying a label.
- Test removable labels before placing them on delicate finishes.
- Avoid labels that are so specific they become outdated quickly.
- Review storage areas occasionally and replace labels that no longer fit.
Clean the Surface First
Wipe away dust, grease, and moisture before applying a label. Allow the surface to dry completely, then press the label down firmly. Test the adhesive in a hidden area before using it on painted, antique, or otherwise delicate finishes.
A Small Tool That Can Make a Noticeable Difference
A handheld label maker will not organize the house on its own, but it can make a good system much easier to maintain. Clear labels show people where things belong, reduce unnecessary searching, and help prevent clutter from creeping back into recently cleaned spaces.
I would start with one problem area rather than trying to label the entire house in a day. The pantry, a crowded closet, or the household junk drawer is usually enough. Once you see how much easier that space becomes to use, finding the next labeling project probably will not be difficult.
Choose One Cluttered Space Today
You do not need to label the entire house at once. Begin with the pantry, junk drawer, home-office files, or one crowded closet. Give everything a clear place, label it, and see how much easier the space becomes to maintain.